

Part 2 of our Diablo 2 walkthrough covers Act 2, from your arrival in the desert town of Lut Gholein to the fight with Duriel in Tal Rasha's Tomb. It is the act with the most running around, because you have to build the Horadric Staff from three pieces before you can reach the boss.
Diablo 2 walkthrough: ← Previous part | Next part →
The whole walkthrough
| Part | Covers |
|---|---|
| Act 1 | Class pick, Rogue Encampment, Blood Raven, Cain, the Countess, Andariel |
| Act 2 | Lut Gholein, Radament, the Horadric Staff, the Summoner, Duriel |
| Act 3 | Kurast Docks, Lam Esen's Tome, Khalim's Will, Travincal, Mephisto |
| Act 4 | Pandemonium Fortress, Izual, the Hellforge, Chaos Sanctuary, Diablo |
| Act 5 | Harrogath, Anya, Nihlathak, the Ancients, Baal, what to do next |
Quests in Act 2
- Radament's Lair
- The Horadric Staff
- Tainted Sun
- Arcane Sanctuary
- The Summoner
- The Seven Tombs
Radament's Lair is optional. The Horadric Staff, Tainted Sun, Arcane Sanctuary, The Summoner and The Seven Tombs all sit on the path to Duriel.
First stop: hire a new mercenary
Talk to Greiz in Lut Gholein. Act 2 mercenaries are spearmen who carry an aura, and many players keep one for the whole game. Since D2R patch 2.4 you can hire every aura type on every difficulty. Popular picks are the Holy Freeze (slows enemies) and Might (more damage) mercs, and the Prayer merc is nice for healing. Your Act 1 Rogue can come along, but a desert merc is usually stronger from here on.
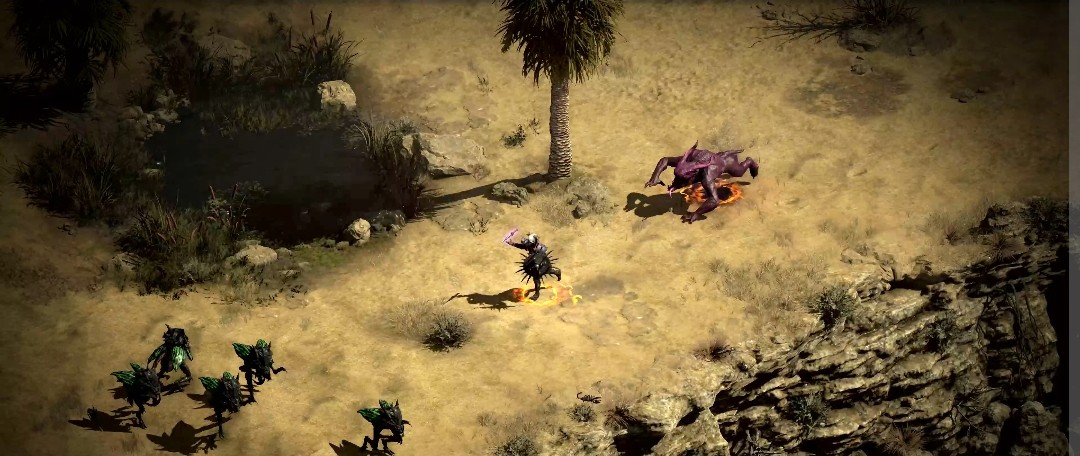
1. Radament's Lair
Atma asks you to kill Radament, who lives in the sewers under town.
- Enter the Sewers through the trapdoor in Lut Gholein.
- Grab the Sewers Level 2 waypoint on the way down.
- Radament is on Sewers Level 3. He raises skeletons and casts poison, so kill him fast or pull him away from his minions.
- He drops a Book of Skill. Read it right away.
Reward: 1 skill point from the book, plus cheaper prices in town. Always worth doing.
2. The Horadric Staff (three pieces)
Talk to Deckard Cain to learn about the staff. You need three items. Do them in any order, but this order follows the map.
The Horadric Cube
- Go through the Rocky Waste to the Dry Hills.
- Find the Halls of the Dead. The Horadric Cube is in a chest on Level 3.
The Cube is also a crafting box. Keep it: you will use it for the staff and for Khalim's Will in Act 3.
The Staff of Kings
- From the Dry Hills, go on to the Far Oasis.
- Find the Maggot Lair. The Staff of Kings is in a chest on Level 3, guarded by a big unique sand maggot.
The tunnels are narrow, so ranged characters should fight from the end of a corridor.
The Amulet of the Viper (Tainted Sun)
Walk into the Lost City and the sun goes dark. This starts Tainted Sun. Drognan tells you the cause.
- From the Lost City, enter the Valley of Snakes.
- Find the Claw Viper Temple and go to Level 2.
- Destroy the altar in the middle. The Amulet of the Viper drops and the sun comes back.
Build the staff
Put the Staff of Kings and the Amulet of the Viper in the Horadric Cube and press Transmute. You now have the Horadric Staff. Don't sell it or put it in your stash and forget it.
Rewards: Tainted Sun gives no item, only the amulet and daylight. The staff opens the way to Duriel.
3. Arcane Sanctuary
After Tainted Sun, Drognan tells you to search the palace. Jerhyn lets you into the Palace Cellar.
- Go down to Palace Cellar Level 3. Grab the Palace Cellar Level 1 waypoint on the way.
- At the end of Level 3 is a glowing portal. The unique monster Fire Eye may be near it. Step through.
- You arrive in the Arcane Sanctuary. Take the waypoint next to you.
4. The Summoner
The Arcane Sanctuary is a maze of floating paths with four long arms. The Summoner stands at the end of one of them, next to Horazon's Journal.
- Pick an arm and follow it. If you hit a dead end, go back to the centre and try the next one.
- The Summoner casts elemental spells from range. Get close quickly and focus him down. He is much weaker than an act boss.
- After he dies, read Horazon's Journal. It opens a red portal to the Canyon of the Magi and marks the true tomb symbol in your quest log.
Waypoints worth grabbing
- Sewers Level 2 (Radament).
- Dry Hills and Halls of the Dead Level 2 (the Cube).
- Far Oasis (Staff of Kings) and Lost City (the amulet).
- Palace Cellar Level 1, Arcane Sanctuary and Canyon of the Magi (the Duriel route).
5. The Seven Tombs (Duriel)
The Canyon of the Magi holds seven tombs. Only one is the real Tal Rasha's Tomb.
- Open your quest log and look at the symbol shown for The Seven Tombs.
- Each tomb has a symbol at its entrance. Find the one that matches.
- Fight to the bottom of that tomb. In the last room is the Horadric Orifice. Place the Horadric Staff in it.
- A passage opens to Duriel's Lair. This is the boss.
What Duriel does
- He is a huge melee demon who carries a cold aura like the Paladin's Holy Freeze. You are slowed the whole fight, so you can't really run.
- His jab and charge hit very hard and add cold damage.
- His lair is a small room, so there is little space to dodge.
How to beat him
- Raise cold resistance as much as you can. Thawing Potions from town help.
- Bring a full belt of healing potions, plus extra in your inventory.
- Open a Town Portal in the tomb before you drop into the lair, so you can come back if you die.
- Let your mercenary stand in front of you. Hit Duriel when he is busy with it.
- Many players around level 20 to 24 on Normal manage fine. If you are lower, gain a level or two.
After he dies, walk through to Tyrael. Then go back to Lut Gholein, talk to Jerhyn, and he sends you to Meshif at the docks, who sails you to Act 3.
We may earn a commission from links on this page.
Long rune-farming sessions are easier with a comfortable gaming headset: the Diablo II soundtrack still holds up.
Tips for this part
- The Cube can hold items like a small extra bag. Use it for charms and gems.
- Desert monsters can poison and curse you. Keep a few Antidote Potions handy.
- Your Act 2 merc only uses spears and polearms. Give it the best one you find.
- Check your quest log symbol before entering any tomb. Picking the wrong one wastes a lot of time.
My take
Act 2 is the act I find most fun to come back to. The desert maps are big, but once the Cube clicks in your head everything else falls into place. Duriel still scares me on hardcore, mostly because that tiny room leaves no room for mistakes. Did Duriel kill you on your first run too?
FAQ
How long is Act 2 in Diablo 2?
Expect it to take a bit longer than Act 1, often three to five hours on a first run, because of the three staff pieces and the Arcane Sanctuary maze.
What level should I be for Duriel?
Around level 20 to 24 on Normal is common. Cold resistance and a tanky mercenary help more than a level or two.
How do I find the true Tal Rasha's Tomb?
After killing the Summoner and reading Horazon's Journal, the quest log for The Seven Tombs shows a symbol. Enter the tomb in the Canyon of the Magi that has the same symbol.
Which Act 2 mercenary should I hire?
Holy Freeze and Might are the usual picks. Since patch 2.4 you can hire any aura on any difficulty, so take the one that fits your build.
Diablo 2 walkthrough: ← Previous part | Next part →
Sources
- Diablo Wiki: Quests Act Two diablo2.diablowiki.net
- Almar's Guides: The Horadric Staff almarsguides.com
- StrategyWiki: The Seven Tombs strategywiki.org
- Icy Veins: Patch 2.4 Compendium icy-veins.com
- Almar's Guides: Duriel almarsguides.com